はじめに
Rook Cephをおうち(オンプレ)Kubernetesにデプロイします。
おうちKubernetesにおいても、なにかしらデプロイしようとすると永続的ストレージ(Persist Volume)が必要となり、自動でプロビジョニングされるストレージが欲しくなります。
NAS をネットワーク内に配置し iSCSI 経由で使う方が管理は楽とは考えられるものの、ハードウェアを増やしたくないので、ワーカーのストレージを使って Ceph クラスタを構築することにしました。
下記ページが参考になりました。
HelmでRook Cephをインストール
下記2つのチャートが用意されており、オペレータとクラスタをそれぞれインストールします。
- Rook Ceph Operator: Starts the Ceph Operator, which will watch for Ceph CRs (custom resources)
- Rook Ceph Cluster: Creates Ceph CRs that the operator will use to configure the cluster
今回はv1.14(v1.14.8)をインストールします。
ストレージの確認
Prerequisitesは下記となっており、今回は、 Raw partitions (no formatted filesystem) を使う想定です。
Prerequisites
To check if a Kubernetes cluster is ready for Rook, see the prerequisites.
To configure the Ceph storage cluster, at least one of these local storage options are required:
- Raw devices (no partitions or formatted filesystem)
- Raw partitions (no formatted filesystem)
- LVM Logical Volumes (no formatted filesystem)
- Encrypted devices (no formatted filesystem)
- Multipath devices (no formatted filesystem)
- Persistent Volumes available from a storage class in block mode
全てのワーカーにフォーマットされていないRawパーティションが存在することを確認します。
wurly@k8s-worker1:~$ sudo fdisk -l
(略)
Device             Start       End   Sectors   Size Type
/dev/nvme0n1p1      2048   2203647   2201600     1G EFI System
/dev/nvme0n1p2   2203648 211918847 209715200   100G Linux filesystem
/dev/nvme0n1p3 211918848 500118158 288199311 137.4G Linux filesystem
wurly@k8s-worker1:~$ sudo blkid
/dev/nvme0n1p1: UUID="0D39-3CF0" BLOCK_SIZE="512" TYPE="vfat" PARTUUID="b92ae57c-cd2d-46bb-adf9-efd6004559cd"
/dev/nvme0n1p2: UUID="82294e20-d037-405f-afd6-d17e9b3e7b00" BLOCK_SIZE="4096" TYPE="ext4" PARTUUID="ba4fc244-1762-4bb1-ae6b-8f0d/dev/loop1: TYPE="squashfs"
/dev/loop4: TYPE="squashfs"
/dev/loop2: TYPE="squashfs"
/dev/loop0: TYPE="squashfs"
/dev/loop5: TYPE="squashfs"
/dev/loop3: TYPE="squashfs"
/dev/nvme0n1p3: PARTUUID="6c8a91e6-ca65-ca49-943c-171642f3c1a7"
“data”となっているものはフォーマットされていないものです。
wurly@k8s-worker1:~$ sudo file -s /dev/nvme0n1p3
/dev/nvme0n1p3: data
wurly@k8s-worker2:~$ sudo file -s /dev/nvme0n1p3
/dev/nvme0n1p3: data
wurly@k8s-worker3:~$ sudo file -s /dev/nvme0n1p3
/dev/nvme0n1p3: data
repoの追加
helmのリポジトリを登録します。
helm repo add rook-release https://charts.rook.io/release
helm repo update
helmリポジトリから最新のチャートのバージョンを取得します。
curl -s https://charts.rook.io/release/index.yaml | yq '.entries[] | .[] | {name, version}'
v1.14.8が最新のようです。
$ curl -s https://charts.rook.io/release/index.yaml | yq '.entries[] | .[] | {name, version}'
{
  "name": "rook-ceph",
  "version": "v1.14.8"
}
.
.
.
{
  "name": "rook-ceph-cluster",
  "version": "v1.14.8"
}
.
.
.
オペレータのインストール
helmリポジトリからvalues.yamlを取得します。
helm show values rook-release/rook-ceph --version v1.14.8 > values.yaml
これは変更なしでデプロイしました。
helm install --create-namespace --namespace rook-ceph rook-ceph rook-release/rook-ceph -f values.yaml --version v1.14.8
$ helm install --create-namespace --namespace rook-ceph rook-ceph rook-release/rook-ceph -f values.yaml --version v1.14.8
NAME: rook-ceph
LAST DEPLOYED: Sun Jul  7 16:31:29 2024
NAMESPACE: rook-ceph
STATUS: deployed
REVISION: 1
TEST SUITE: None
NOTES:
The Rook Operator has been installed. Check its status by running:
  kubectl --namespace rook-ceph get pods -l "app=rook-ceph-operator"

Visit https://rook.io/docs/rook/latest for instructions on how to create and configure Rook clusters

Important Notes:
- You must customize the 'CephCluster' resource in the sample manifests for your cluster.
- Each CephCluster must be deployed to its own namespace, the samples use `rook-ceph` for the namespace.
- The sample manifests assume you also installed the rook-ceph operator in the `rook-ceph` namespace.
- The helm chart includes all the RBAC required to create a CephCluster CRD in the same namespace.
- Any disk devices you add to the cluster in the 'CephCluster' must be empty (no filesystem and no partitions).
オペレーターのpodが立ち上がりました。
$ k get pod
NAME                                  READY   STATUS    RESTARTS   AGE
rook-ceph-operator-7b786cb7fd-w6vwv   1/1     Running   0          92s
クラスタのインストール
helmリポジトリからvalues.yamlを取得します。
helm show values rook-release/rook-ceph-cluster --version v1.14.8 > values.yaml
変更前
storage: # cluster level storage configuration and selection
  useAllNodes: true
  useAllDevices: true
  # deviceFilter:
  # config:
  #   crushRoot: "custom-root" # specify a non-default root label for the CRUSH map
  #   metadataDevice: "md0" # specify a non-rotational storage so ceph-volume will use it as block db device of bluestore.
  #   databaseSizeMB: "1024" # uncomment if the disks are smaller than 100 GB
  #   osdsPerDevice: "1" # this value can be overridden at the node or device level
  #   encryptedDevice: "true" # the default value for this option is "false"
  # # Individual nodes and their config can be specified as well, but 'useAllNodes' above must be set to false. Then, only the named
  # # nodes below will be used as storage resources. Each node's 'name' field should match their 'kubernetes.io/hostname' label.
  # nodes:
  #   - name: "172.17.4.201"
  #     devices: # specific devices to use for storage can be specified for each node
  #       - name: "sdb"
  #       - name: "nvme01" # multiple osds can be created on high performance devices
  #         config:
  #           osdsPerDevice: "5"
  #       - name: "/dev/disk/by-id/ata-ST4000DM004-XXXX" # devices can be specified using full udev paths
  #     config: # configuration can be specified at the node level which overrides the cluster level config
  #   - name: "172.17.4.301"
  #     deviceFilter: "^sd."
変更後
storage: # cluster level storage configuration and selection
  useAllNodes: false
  useAllDevices: false
  nodes:
    - name: "k8s-worker1"
      devices:
        - name: "/dev/nvme0n1p3"
    - name: "k8s-worker2"
      devices:
        - name: "/dev/nvme0n1p3"
    - name: "k8s-worker3"
      devices:
        - name: "/dev/nvme0n1p3"
  # deviceFilter:
  # config:
  #   crushRoot: "custom-root" # specify a non-default root label for the CRUSH map
  #   metadataDevice: "md0" # specify a non-rotational storage so ceph-volume will use it as block db device of bluestore.
  #   databaseSizeMB: "1024" # uncomment if the disks are smaller than 100 GB
  #   osdsPerDevice: "1" # this value can be overridden at the node or device level
  #   encryptedDevice: "true" # the default value for this option is "false"
  # # Individual nodes and their config can be specified as well, but 'useAllNodes' above must be set to false. Then, only the named
  # # nodes below will be used as storage resources. Each node's 'name' field should match their 'kubernetes.io/hostname' label.
  # nodes:
  #   - name: "172.17.4.201"
  #     devices: # specific devices to use for storage can be specified for each node
  #       - name: "sdb"
  #       - name: "nvme01" # multiple osds can be created on high performance devices
  #         config:
  #           osdsPerDevice: "5"
  #       - name: "/dev/disk/by-id/ata-ST4000DM004-XXXX" # devices can be specified using full udev paths
  #     config: # configuration can be specified at the node level which overrides the cluster level config
  #   - name: "172.17.4.301"
  #     deviceFilter: "^sd."
helm installします。
helm install --namespace rook-ceph rook-ceph-cluster --set operatorNamespace=rook-ceph rook-release/rook-ceph-cluster -f values.yaml --version v1.14.8
$ helm install --namespace rook-ceph rook-ceph-cluster --set operatorNamespace=rook-ceph rook-release/rook-ceph-cluster -f values.yaml --version v1.14.8
NAME: rook-ceph-cluster
LAST DEPLOYED: Sun Jul  7 17:01:51 2024
NAMESPACE: rook-ceph
STATUS: deployed
REVISION: 1
TEST SUITE: None
NOTES:
The Ceph Cluster has been installed. Check its status by running:
  kubectl --namespace rook-ceph get cephcluster

Visit https://rook.io/docs/rook/latest/CRDs/ceph-cluster-crd/ for more information about the Ceph CRD.

Important Notes:
- You can only deploy a single cluster per namespace
- If you wish to delete this cluster and start fresh, you will also have to wipe the OSD disks using `sfdisk`
podが立ち上がり始めます。
$ k get pod -n rook-ceph
NAME                                      READY   STATUS            RESTARTS   AGE
rook-ceph-csi-detect-version-d4xpq        0/1     PodInitializing   0          69s
rook-ceph-mon-a-785fb58fc5-ddxps          1/2     Running           0          22s
rook-ceph-mon-b-canary-5d4fc9d757-hzbz5   0/2     Terminating       0          27s
rook-ceph-mon-c-canary-59d8875d8b-dff2j   0/2     Terminating       0          27s
rook-ceph-operator-7b786cb7fd-w6vwv       1/1     Running           0          31m
最終的にはこれらのpodが立ち上がりました。
$ k get pod -n rook-ceph
NAME                                                    READY   STATUS      RESTARTS      AGE
csi-cephfsplugin-6dnmp                                  2/2     Running     1 (65s ago)   99s
csi-cephfsplugin-ldf7c                                  2/2     Running     0             99s
csi-cephfsplugin-lwjk2                                  2/2     Running     1 (53s ago)   99s
csi-cephfsplugin-provisioner-55d789d7bd-89fqf           5/5     Running     1 (57s ago)   99s
csi-cephfsplugin-provisioner-55d789d7bd-l7b22           5/5     Running     0             99s
csi-rbdplugin-kb2x2                                     2/2     Running     1 (66s ago)   99s
csi-rbdplugin-nkhfc                                     2/2     Running     1 (61s ago)   99s
csi-rbdplugin-provisioner-7c6dcb4dff-5w2g5              5/5     Running     1 (54s ago)   99s
csi-rbdplugin-provisioner-7c6dcb4dff-x4w4t              5/5     Running     1 (54s ago)   99s
csi-rbdplugin-qxg5k                                     2/2     Running     0             99s
rook-ceph-crashcollector-k8s-worker1-7c6849f54d-ss9bq   1/1     Running     0             50s
rook-ceph-crashcollector-k8s-worker2-7455dbcf6f-2wnsk   1/1     Running     0             18s
rook-ceph-crashcollector-k8s-worker3-b5b4f7464-g44kx    1/1     Running     0             11s
rook-ceph-exporter-k8s-worker1-668d7f4755-h7jxd         1/1     Running     0             50s
rook-ceph-exporter-k8s-worker2-5777c8776b-xr88d         1/1     Running     0             15s
rook-ceph-exporter-k8s-worker3-6b48d7bbf5-t2g22         1/1     Running     0             8s
rook-ceph-mds-ceph-filesystem-a-7b4d7b9dc4-hvx95        2/2     Running     0             18s
rook-ceph-mds-ceph-filesystem-b-6d45c6f856-v97xb        2/2     Running     0             12s
rook-ceph-mgr-a-86854b9cc5-7q2jh                        3/3     Running     0             66s
rook-ceph-mgr-b-b9476b944-dtbrl                         3/3     Running     0             66s
rook-ceph-mon-a-785fb58fc5-ddxps                        2/2     Running     0             2m49s
rook-ceph-mon-b-5d6d79754f-fqqjk                        2/2     Running     0             2m23s
rook-ceph-mon-c-6c448864bb-lvz2v                        2/2     Running     0             81s
rook-ceph-operator-7b786cb7fd-w6vwv                     1/1     Running     0             33m
rook-ceph-osd-0-6c7f9998ff-hn2vd                        2/2     Running     0             35s
rook-ceph-osd-1-6ffbb5c9fd-jr6n7                        2/2     Running     0             34s
rook-ceph-osd-2-b67867f79-xgt9k                         2/2     Running     0             33s
rook-ceph-osd-prepare-k8s-worker1-x58p2                 0/1     Completed   0             43s
rook-ceph-osd-prepare-k8s-worker2-cfkxv                 0/1     Completed   0             43s
rook-ceph-osd-prepare-k8s-worker3-jpbbz                 0/1     Completed   0             43s
Cephクラスターが正しく生成されました。
$ k get cephcluster
NAME        DATADIRHOSTPATH   MONCOUNT   AGE     PHASE   MESSAGE                        HEALTH      EXTERNAL   FSID
rook-ceph   /var/lib/rook     3          5m33s   Ready   Cluster created successfully   HEALTH_OK              18be74a6-d73c-4f2f-b5c6-267d7e2b43c9
Dashboard
port-forward でダッシュボードにアクセスします。
kubectl port-forward -n rook-ceph svc/rook-ceph-mgr-dashboard 8443:8443
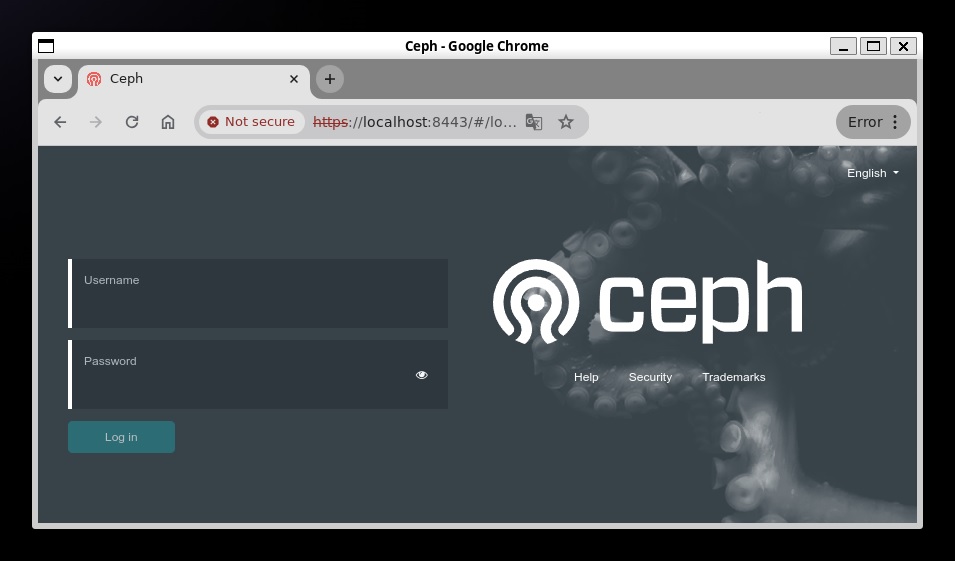
ユーザーIDは”admin”、パスワードは下記により取得します。
kubectl get secret -n rook-ceph rook-ceph-dashboard-password -ojson | jq -r '.data.password' | base64 --decode
ダッシュボード
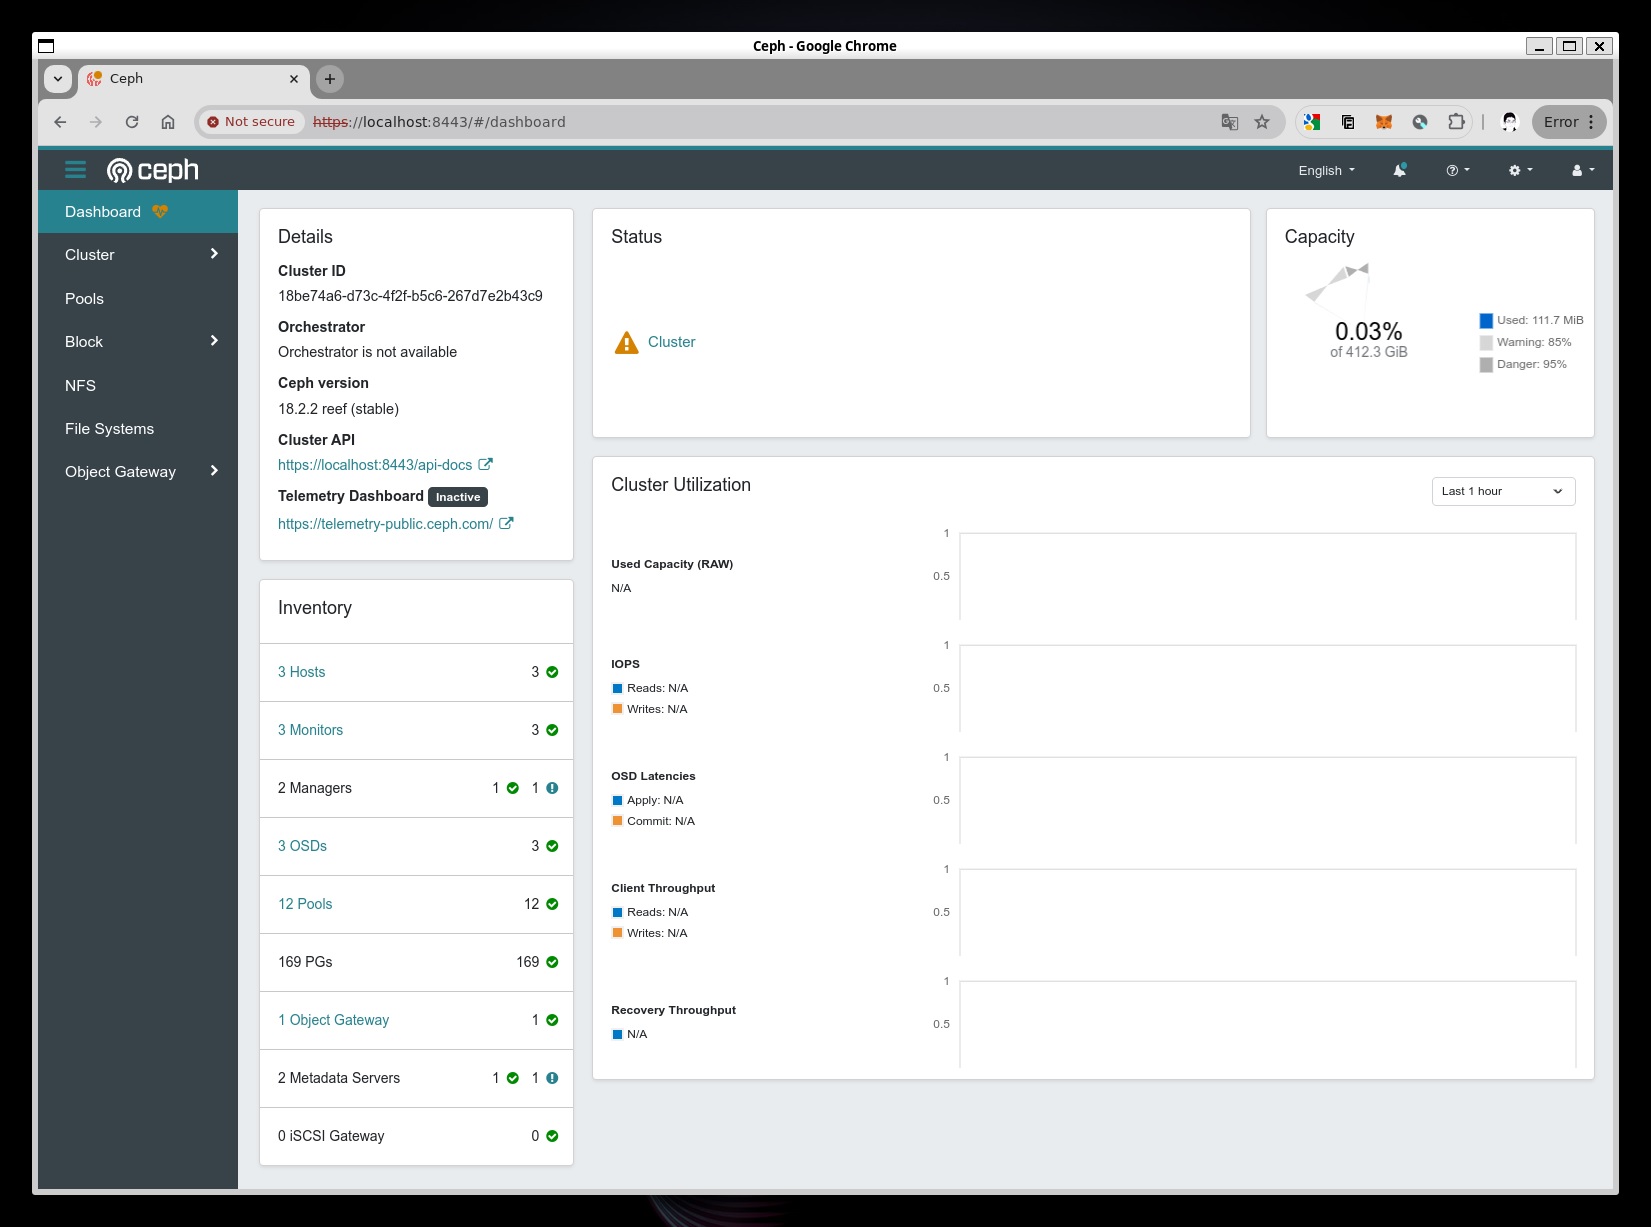
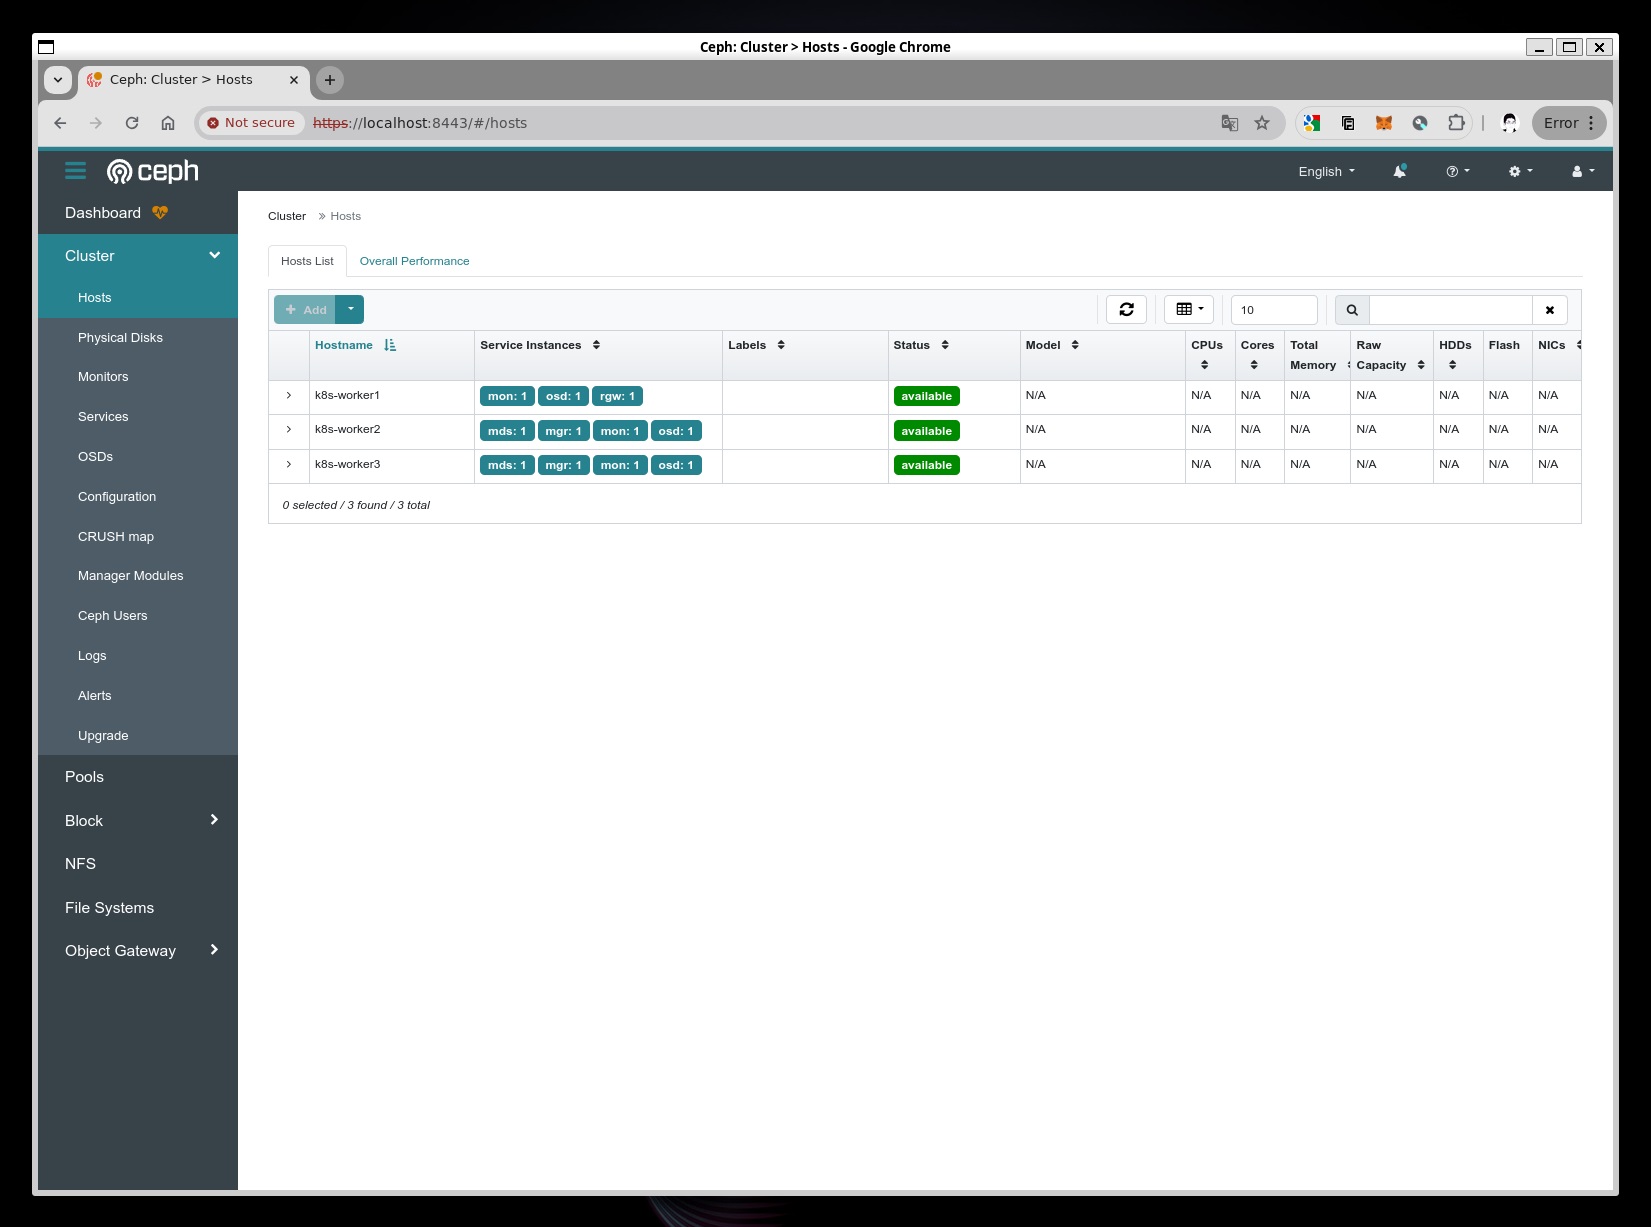
ホスト
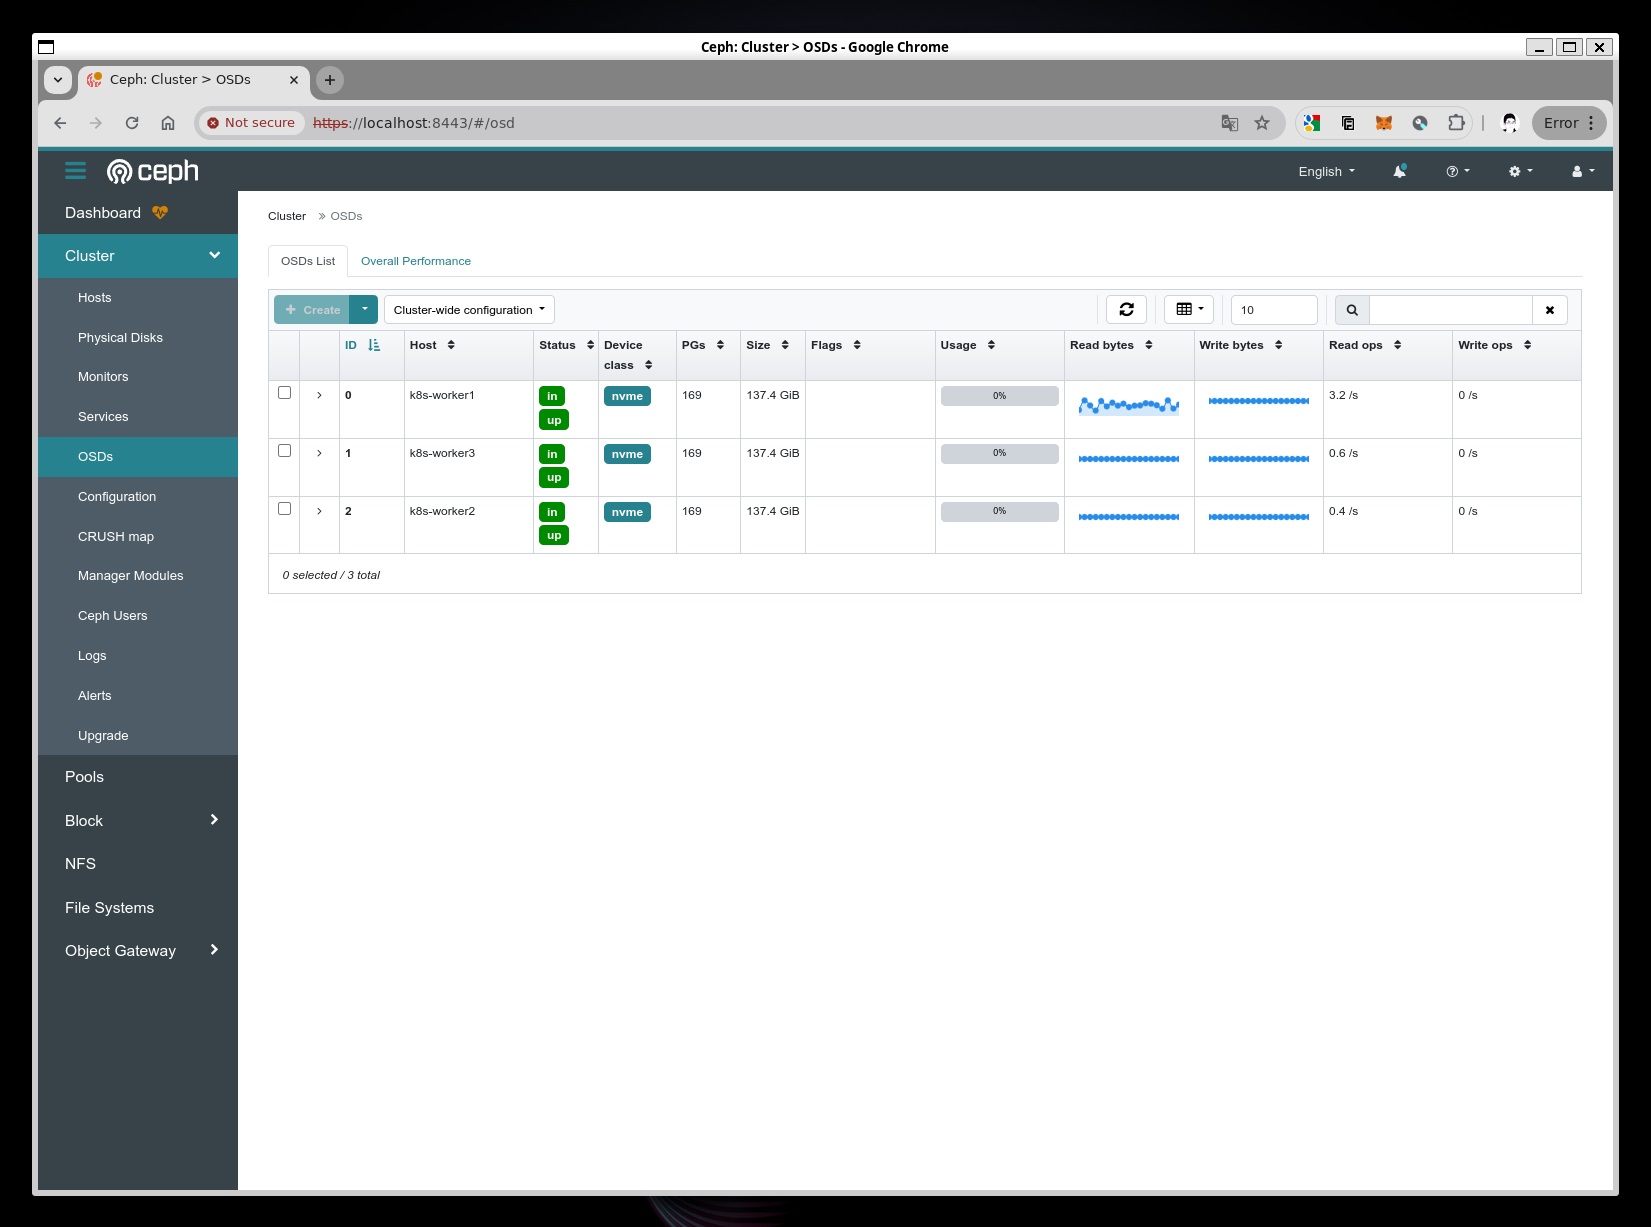
OSDs
参考
- Rook-Cephをデプロイする #Ubuntu – Qiita
- kubeadmで構築したk8s環境にdashboardやMetalLB,Loadbalancerを導入したり、workerノードを追加したりする #kubernetes – Qiita
- Prerequisites – Rook Ceph Documentation
- rook/rook: Storage Orchestration for Kubernetes
- Prerequisites – Rook Ceph Documentation
- Deploy Ceph Storage Cluster in Kubernetes using Rook – kifarunix.com
- rook/rook: Storage Orchestration for Kubernetes
- Rook CephのHelmチャートをオンプレKubernetesにデプロイ #kubernetes – Qiita
- Rook v1.2での変更点まとめ – TECHSTEP
- Rook-Cephをデプロイする #Ubuntu – Qiita
- Using Ceph Storage
- Rook-Cephを覗いてみる #kubernetes – Qiita
- 複数ブロックストレージをアタッチして Rook/Ceph を構築
- Cleanup – Rook Ceph Documentation
- Kubernetesでお手軽ストレージ構築!Rook Ceph導入の5ステップ / 開発者向けブログ・イベント | GMO Developers
- Ceph Cluster Helm Chart – Rook Ceph Documentation
